No matter which phone you use, it should have a voice control function. Like Jason, he occasionally chats with Siri XD. However, Arduino is basically not used for complex speech recognition, but it can still detect the size of the sound. In this case, it must be used with a sound sensing module.
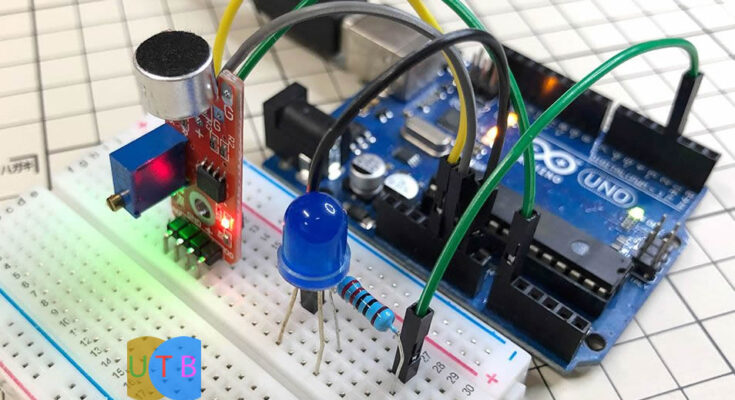
There are many styles of sound modules, the most common one is this red board, which has two output pins, analog and digital, and can be selected according to our needs. Although it is cheap and easy to get, the disadvantage is that the sensitivity is not very good. The sound needs to be very close and the volume must be loud enough for it to respond. Jason has tested a number of modules that cost less than 100 yuan, and they all have similar effects.

If you need a higher-sensitivity sound module, Jason recommends choosing the Weixue version, which uses the audio processing chip LM386. It can measure subtle changes in sound, but the price is naturally higher.
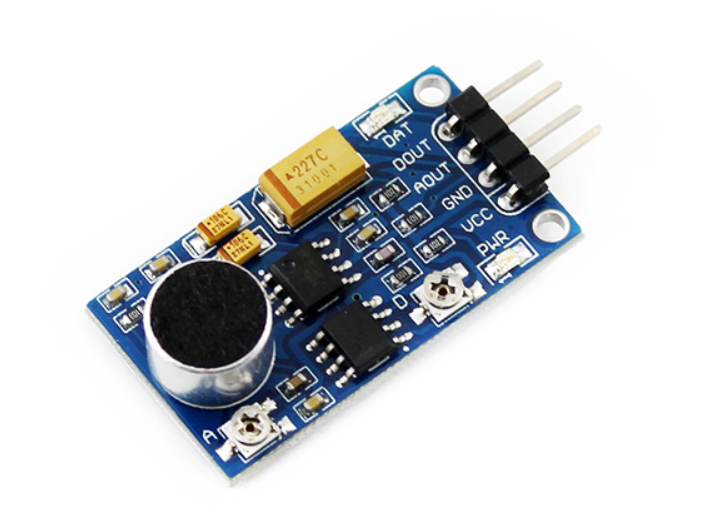
Our example this time uses the common red sound module. Its A0 analog output pin can be connected to the Uno board’s analog input pins, A0~A5. We will get a value from 0 to 1023 based on the measured volume. The D0 digital output pin determines the output LOW or HIGH based on the Threshold Value. The “threshold value” can be adjusted by the variable resistor on the board: clockwise, the threshold value increases; counterclockwise , the threshold value is lowered; you can check whether the green light is on when adjusting.

Our example this time uses the common red sound module. Its A0 analog output pin can be connected to the Uno board’s analog input pins, A0~A5. We will get a value from 0 to 1023 based on the measured volume. The D0 digital output pin determines the output LOW or HIGH based on the Threshold Value. The “threshold value” can be adjusted by the variable resistor on the board: clockwise, the threshold value increases; counterclockwise , the threshold value is lowered; you can check whether the green light is on when adjusting.

The program is even simpler. It just reads the analog input value of A0. We first let it be displayed in the monitoring window. This value is different for each module when it leaves the factory. If you need to modify the starting value of the ambient volume, you can change it through the threshold adjustment resistor.
void setup() {
 Serial.begin(9600); //Start outputting messages to the monitoring window
}

void loop() {
 int sensorValue = analogRead(A0); //Read the value of A0
 Serial.println(sensorValue); //Display the read value in the monitoring window
 delay(10);
}
In fact, this is the most important thing. Through analogRead(), we can get the volume given to us by the sound sensor.
int sensorValue = analogRead(A0);
At this time, open the monitor window, try to speak loudly, or clap your hands at close range, and you will find that the value will change.

Next, let’s connect an additional LED light and add a few lines to the program. When the volume is greater than a certain value, the light will light up, otherwise it will go out.
void setup() {
 Serial.begin(9600);
 pinMode(3,OUTPUT);
}

void loop() {
 int sensorValue = analogRead(A0);
 Serial.println(sensorValue);
 if(sensorValue > 35){ //When the volume exceeds a certain value, this value is modified according to individual circumstances.
 digitalWrite(3,HIGH); //Light on
 }else{
 digitalWrite(3,LOW); //Light off
 }
 delay(10);
}
