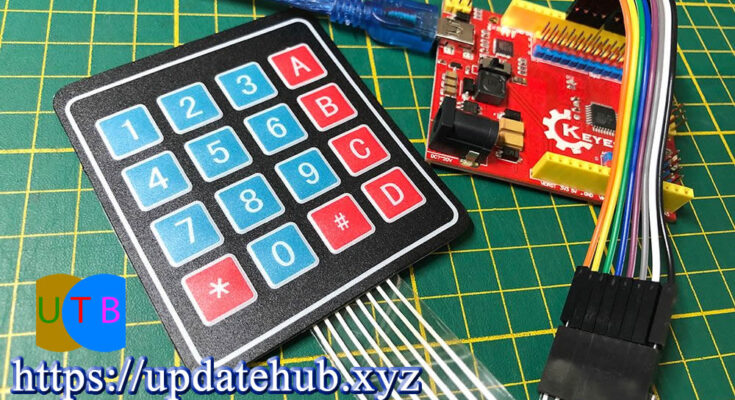
There are many methods for Arduino operation input, and the simplest ones are of course button-related components. But if the input becomes complicated, such as entering a password, you may want to consider using a keyboard module.
There are many types of Arduino keyboards, including membrane type, mechanical type, 5×4, 4×4, 4×3, 4×1… and so on. Among them, the most commonly used ones are membrane type 4×4 and 4×3. Basically, these two types are used. The method is exactly the same, let’s first use the 4×4 version to illustrate.
It is not difficult to program the keyboard. In fact, you can write it yourself without using a function library. However, for convenience, Jason is still accustomed to using a function library, and he chose the most common Adafruit Keypad function library.
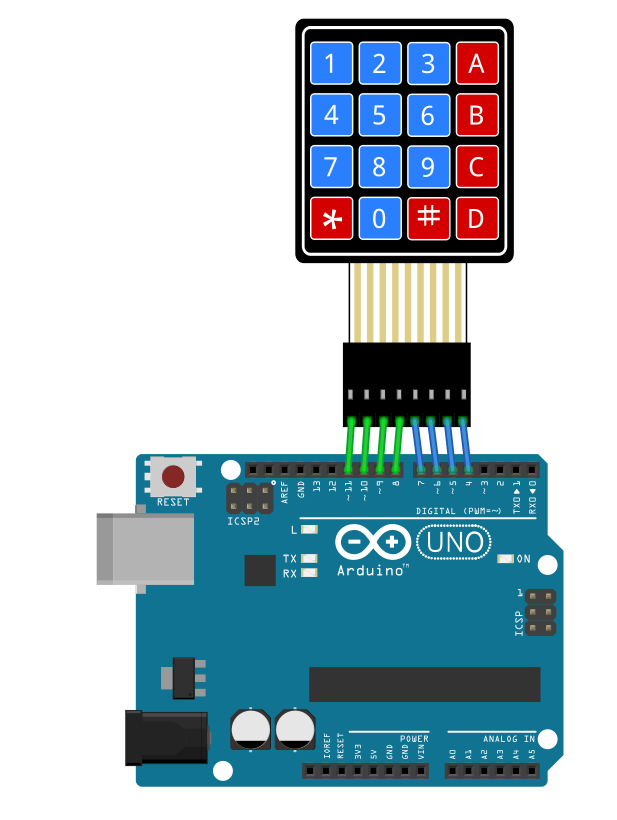
Jason simplified and rewritten the sample program keypad_test. The program is very simple. First, define the keyboard with several rows and columns.
const byte ROWS = 4; // Number of columns (horizontal)
const byte COLS = 4; // Number of lines (straight)
Then define the name of each key on the keyboard
char keys[ROWS][COLS] = {
  {'1','2','3','A'},
  {'4','5','6','B'},
  {'7','8','9','C'},
  {'*','0','#','D'}
};
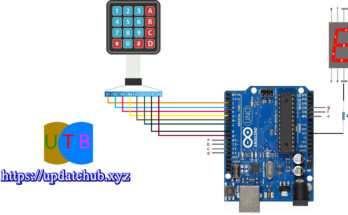
Then define the pin positions respectively.
byte rowPins[ROWS] = {11, 10, 9, 8}; //Define the pins of the column
byte colPins[COLS] = {7, 6, 5, 4}; /Define the pins of the row
The setting work is basically like this. The main syntax customKeypad.tick() must be written in the loop, so that it can continuously detect what keys the user presses, and then determine what keys are pressed.
while(customKeypad.available()){
 keypadEvent e = customKeypad.read();
 Serial.print((char)e.bit.KEY);
 if(e.bit.EVENT == KEY_JUST_PRESSED) Serial.println("pressed");
 //The pressed state is KEY_JUST_PRESSED
 else if(e.bit.EVENT == KEY_JUST_RELEASED) Serial.println("released");
 //The released state is KEY_JUST_RELEASED
 }
The program is now complete! Below are examples of 4×4 and 4×3 respectively. As for the relatively rare 5×4, the usage methods are exactly the same, but there are more pin positions, so you can adapt it yourself!
4×4 Membrane Keyboard Sample Program
//4x4 membrane keyboard sample program

#include "Adafruit_Keypad.h"

const byte ROWS = 4; // Number of columns (horizontal)
const byte COLS = 4; // Number of lines (straight)
//The name of each key on the keyboard
char keys[ROWS][COLS] = {
 {'1','2','3','A'},
 {'4','5','6','B'},
 {'7','8','9','C'},
 {'*','0','#','D'}
};
byte rowPins[ROWS] = {11, 10, 9, 8}; //Define the pins of the column
byte colPins[COLS] = {7, 6, 5, 4}; //Define the pins of the row

//Initialize the keyboard
Adafruit_Keypad customKeypad = Adafruit_Keypad( makeKeymap(keys), rowPins, colPins, ROWS, COLS);

void setup() {
 Serial.begin(9600);
 customKeypad.begin();
 Serial.println("KeyPad Test...");
}

void loop() {
 // Start detecting the user's button status
 customKeypad.tick();

 //Determine which key was pressed
 while(customKeypad.available()){
 keypadEvent e = customKeypad.read();
 Serial.print((char)e.bit.KEY);
 if(e.bit.EVENT == KEY_JUST_PRESSED) Serial.println("pressed");
 //The pressed state is KEY_JUST_PRESSED
 else if(e.bit.EVENT == KEY_JUST_RELEASED) Serial.println("released");
 //The released state is KEY_JUST_RELEASED
 }

 delay(10);
}
4×3 Membrane Keyboard Sample Program
//4x4 membrane keyboard sample program

#include "Adafruit_Keypad.h"

const byte ROWS = 4; // Number of columns (horizontal)
const byte COLS = 3; // Number of lines (straight)
//The name of each key on the keyboard
char keys[ROWS][COLS] = {
 {'1','2','3'},
 {'4','5','6'},
 {'7','8','9'},
 {'*','0','#'}
};
byte rowPins[ROWS] = {11, 10, 9, 8}; //Define the pins of the column
byte colPins[COLS] = {7, 6, 5}; //Define the pins of the row


//Initialize the keyboard
Adafruit_Keypad customKeypad = Adafruit_Keypad( makeKeymap(keys), rowPins, colPins, ROWS, COLS);

void setup() {
 Serial.begin(9600);
 customKeypad.begin();
 Serial.println("KeyPad Test...");
}

void loop() {
 // Start detecting the user's button status
 customKeypad.tick();

 //Determine which key was pressed
 while(customKeypad.available()){
 keypadEvent e = customKeypad.read();
 Serial.print((char)e.bit.KEY);
 if(e.bit.EVENT == KEY_JUST_PRESSED) Serial.println("pressed");
 //The pressed state is KEY_JUST_PRESSED
 else if(e.bit.EVENT == KEY_JUST_RELEASED) Serial.println("released");
 //The released state is KEY_JUST_RELEASED
 }

 delay(10);
}